


Table of Contents
- Custom Gift Box Assembly Supplies You'll Need
- Personalized Gift Box Ideas for Friends: Choosing a Theme
- Step-by-Step: How to Assemble a Personalized Gift Box
- Creative Gift Box Filler Ideas That Elevate Presentation
- How to Pack a Gift Box for Shipping Without Damage
- Troubleshooting Common Assembly Errors
- DIY vs. Pre-Made: When to Skip the Crafting
- Conclusion
Last Updated: August 20, 2026
Assembling a personalized gift box from scratch looks intimidating until you've done it once. The process comes down to a handful of early decisions: the right materials, a clear theme, and clean structural technique.
The biggest mistake first-timers make is skipping the planning phase. They grab cardboard, start cutting, and end up with a box that won't close properly or crushes the contents. Below, we'll walk through every stage from supplies to shipping, including sustainable material choices and troubleshooting.
Custom Gift Box Assembly Supplies You'll Need
Good results start with the right materials.
Box Structures: Rigid vs. Collapsible
Arigid box is constructed from thick chipboard or greyboard and holds its shape permanently. These deliver the most impressive unboxing experience but take more time to build.
Acollapsible box is made from scored and folded single-layer cardboard. It folds flat for storage and shipping, making it far more practical for mailing. For most DIY personalized gift box projects, a collapsible structure is the better starting point.
Choose your structure based on contents. Heavy items like cast iron trinket boxes need rigid walls. Lighter items like candles, stationery, or jewelry work perfectly in a well-scored collapsible design.
Adhesive, Scoring, and Cutting Tools
Precision is everything in box assembly. Invest in these before you start:
- Bone folder: The single most important tool for clean creasing and folding.
- Metal ruler and self-healing cutting mat: Cardboard cuts require firm, straight edges.
- Craft knife or rotary cutter: Far cleaner than scissors for straight cuts.
- PVA glue or double-sided tape: PVA creates the strongest bond for cardboard-to-cardboard adhesion.
- Scoring tool or empty ballpoint pen: For marking fold lines without cutting through the material.
According to The Craft and Hobby Association's material guidance, the quality of your cutting and scoring tools directly affects the finished structure's durability.
Personalized Gift Box Ideas for Friends: Choosing a Theme
Choosing a theme before you cut a single piece of cardboard determines box dimensions, color palette, filler material, and the overall story the gift tells.
The strongest personalized gift box ideas center on one clear identity. A cozy mystery reader gets a dark-toned box with matte black exterior and charcoal filler. A journaling enthusiast gets kraft paper construction with warm amber tissue and a handwritten note.
A few theme frameworks that work well:
- The "Cozy Night In" box: Dark novel, small candle, soft socks, and a handwritten quote card. Warm, amber-toned filler paper.
- The "Writer's Desk" box: Stationery bundle, fine-tip pen, small trinket tray, and motivational note. Kraft paper exterior, twine closure.
- The "Black Cat Collector" box: Black cat-themed home decor, dark mystery novel, and decorative trinket. Matte black box with silver tissue.
Once the theme is locked, measure your items before touching the cardboard.

Step-by-Step: How to Assemble a Personalized Gift Box
A personalized gift box assembled with proper technique will look like something from a boutique shop.
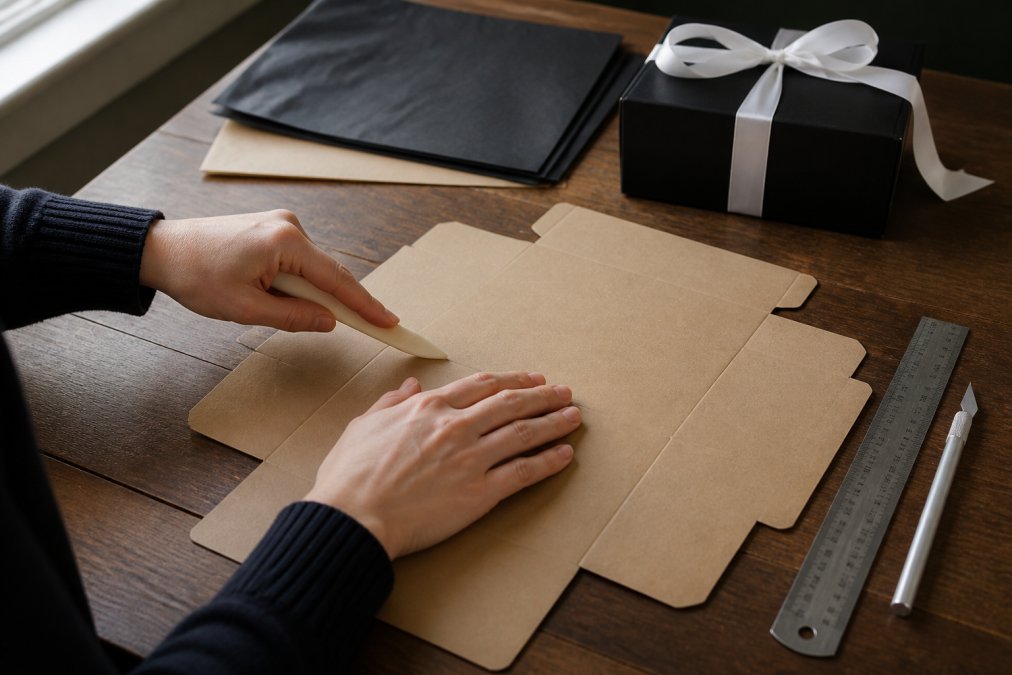
Step 1: Measure Your Items and Cut the Cardboard
Lay all items flat and measure the total footprint. Add 1.5 cm to the length and width for clearance, and measure the tallest item to determine wall height. Add another 1 cm to the wall height for clean folding at the top edge.
Mark your cutting lines on the cardboard with a pencil and metal ruler. Cut with a craft knife in two or three firm passes rather than one aggressive stroke. For a standard collapsible box, cut one base piece and four wall panels.
Step 2: Score, Fold, and Create the Box Base
Scoring is where most errors originate.
Place your metal ruler along the fold line. Run your bone folder firmly along the edge, pressing hard enough to compress the cardboard fibers without cutting through. Fold toward the scored side: the compressed fibers create a clean, sharp crease.
For the box base, score all four fold lines before making a single fold. Then fold each wall panel up, apply PVA glue to the corner tabs, and press firmly for 30 seconds. Use binder clips to hold corners while the adhesive sets. Allow at least 20 minutes of drying time before moving to the lid.
Step 3: Construct the Lid and Check Alignment
The lid should be 2-3 mm larger in both dimensions than the base. This tolerance allows the lid to sit flush without binding or sliding off.
Before gluing the lid corners, do a dry fit: place the unglued lid over the finished base and check that it sits level and closes without force. If it binds, shave the edge with a craft knife in small increments.
Once the fit is confirmed, glue and clamp the lid corners exactly as you did the base. Check alignment from above: all four corners should be square.
Step 4: Decorative Finishing Touches
Cut your decorative paper slightly larger than each panel, apply a thin, even layer of PVA glue to the cardboard surface, and smooth the paper from the center outward to eliminate air bubbles. Wrap excess paper around the interior edges and press firmly.
Additional finishing options:
- Ribbon or twine closure threaded through small punched holes
- A wax seal on the lid
- Printed labels or hand-lettered tag attached to the exterior
- A strip of coordinating washi tape along the lid seam
Creative Gift Box Filler Ideas That Elevate Presentation
Filler material is not just padding. It is the visual bed that frames everything inside the box.
The most effective creative gift box filler ideas work with the theme:
- Crinkle paper shreds: Available in dozens of colors. Black or deep burgundy suit dark mystery themes. Kraft-colored shreds work for natural or literary themes.
- Tissue paper: Layered tissue creates depth. Use two tones from the same palette for a more sophisticated look.
- Fabric scraps or a small pocket cloth: A folded piece of velvet or linen adds tactile richness.
- A handwritten quote card: Tuck it under the top layer of filler so the recipient discovers it last.
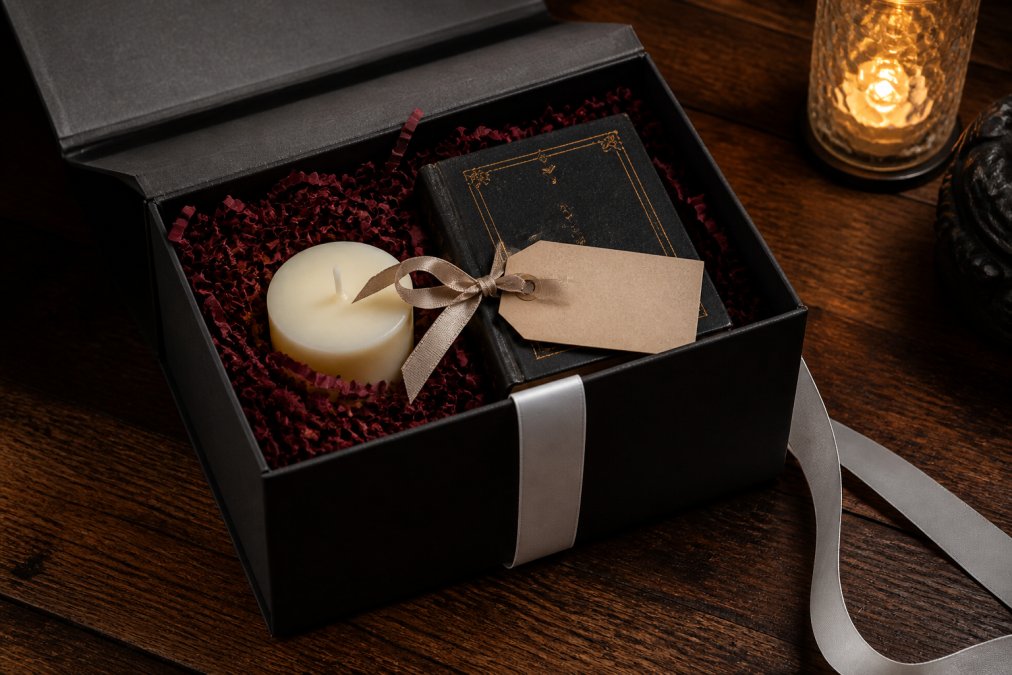
For a ready-made version, the Journal Box: A Curated Stationery Bundle for Writers and Dreamers from GreyDoor Goods demonstrates how to pair functional items with a cohesive theme and presentation.
How to Pack a Gift Box for Shipping Without Damage
A beautifully assembled personalized gift box can arrive crushed if it isn't packed correctly for transit.
Your decorative box should live inside a plain shipping box, not be the shipping container itself. A handcrafted collapsible box is not designed to withstand the compression forces of a delivery network.
Follow this packing sequence:
- Wrap the finished gift box in a single layer of tissue or kraft paper to protect the decorative surface.
- Place it inside a corrugated shipping box with at least 5 cm of clearance on all sides.
- Fill that clearance with packing peanuts, air pillows, or crumpled kraft paper.
- Seal the shipping box with reinforced packing tape on all seams.
- Mark the outer box "Fragile" and "This Side Up" if needed.
According to USPS packaging guidelines for fragile items, double-boxing is the recommended method for any item that cannot withstand normal handling pressure.
For items like candles or glass trinkets, wrap each piece individually in bubble wrap before placing in the gift box.
Troubleshooting Common Assembly Errors
Most assembly problems are predictable.
The box won't close flat. This almost always means the score lines are inconsistent. Unglue the corners if the adhesive hasn't fully cured, re-score the fold lines with more pressure, and refold.
Corners are pulling apart. The adhesive was applied too thinly or pieces weren't held under pressure long enough. Apply a thin bead of PVA along the interior corner seam and clamp for at least 30 minutes.
Decorative paper is bubbling. Air was trapped during application. If the glue is still wet, lift the paper gently from one edge and smooth outward again.
The lid is too tight. Sand the exterior walls of the base lightly with fine-grit sandpaper in small increments.
As the Packaging Digest resource on structural box design notes, most structural failures trace back to measurement errors in the initial cutting phase rather than adhesive or folding problems.
DIY vs. Pre-Made: When to Skip the Crafting
Building a personalized gift box from scratch takes time. For a single meaningful gift, the investment is worthwhile. For a dozen boxes, or when time is scarce, the calculation changes.
| Scenario | DIY Box | Pre-Made or Curated Box |
|---|---|---|
| Single gift for a close friend | Best choice: fully customizable | Acceptable if curated well |
| Multiple gifts for an event | Time-intensive; inconsistent results | More practical and consistent |
| Recipient has very specific taste | DIY lets you tailor exactly | Depends on curation quality |
| Shipping across the country | Requires extra packaging effort | Often already shipping-optimized |
| Budget is tight | Lower material cost | Higher upfront but no labor |
| You enjoy crafting | Rewarding process | Misses the point |
DIY wins on personalization and loses on time. A well-curated pre-made option can close that gap if the curation is genuinely thoughtful.
If you want the presentation handled without losing the personal touch, GreyDoor Goods offers a Gift Wrap: Bundle and Wrap service that includes bundling, wrapping, and a printed personal message.

Creating a truly memorable personalized gift box requires more planning than most people expect and more patience than most guides admit. GreyDoor Goods exists for the moments when you want that same level of thoughtfulness without the crafting overhead. From the Acorn Trinket Box to the Journal Box stationery bundle, every item is curated to work as part of a cohesive gift story. Browse the full collection and let the curation do the heavy lifting for you.

Frequently Asked Questions
What materials do I need to assemble a custom gift box?
The core supplies are a rigid cardboard or chipboard sheet, a bone folder or scoring tool, a metal ruler, a craft knife or scissors, and a strong adhesive such as PVA glue or double-sided tape. For finishing, you'll want decorative paper, tissue paper, and ribbon. If you prefer to skip the build entirely, GreyDoor Goods offers a gift bundling and wrapping service for $7.99 that handles all of this for you.
How do I make a personalized gift box look professional?
Precision is the difference between a homemade look and a polished one. Score every fold line before creasing so edges stay crisp, cut cardboard with a sharp craft knife against a metal ruler rather than scissors, and use consistent measurements throughout. Wrap the exterior in coordinating decorative paper, tuck tissue paper neatly inside, and finish with a printed or handwritten tag. Structural integrity matters too, reinforce corners with extra adhesive so the lid fits snugly.
How do I secure items inside a gift box for shipping?
Pack heavier items on the bottom and fill all empty space with crinkle paper, tissue, or bubble wrap so contents cannot shift in transit. Wrap fragile items individually before placing them in the box. Once packed, seal the outer shipping box with pressure-sensitive tape along every seam. For added protection on longer routes, place the decorated gift box inside a plain corrugated shipping box with at least 2 inches of cushioning on all sides.
What are common gift box assembly mistakes to avoid?
The most frequent errors are skipping the scoring step (which causes ragged, uneven folds), cutting the lid the same size as the base (it needs to be slightly larger to fit over it), and using too little adhesive at corners (which causes the box to lose its shape). Rushing the drying time is another common problem, let each glued section set fully before moving to the next step to maintain the box's structural integrity throughout assembly.
This article was written using GrandRanker